Hello fellow crafters!
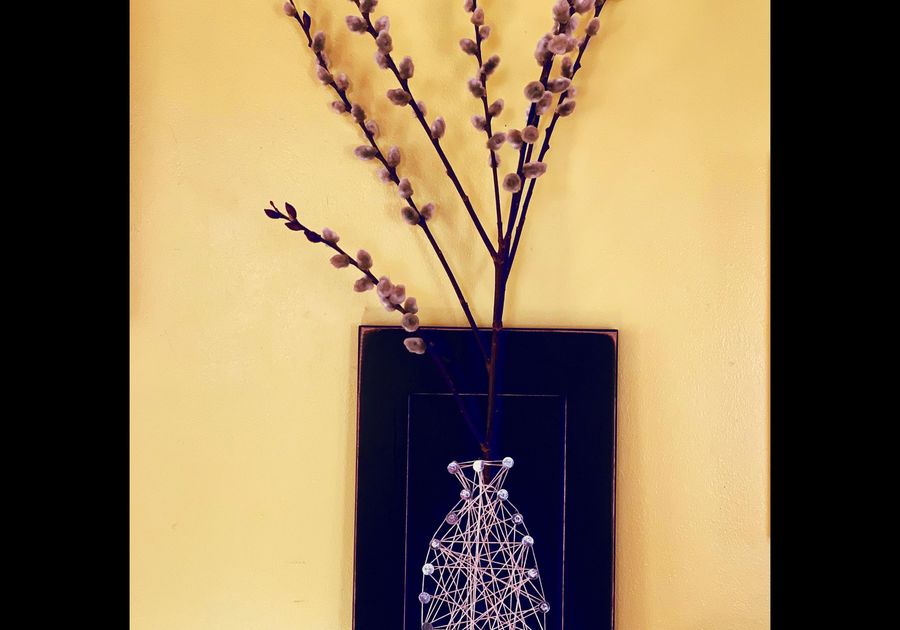
This month’s Get Crafty DIY is geared towards kids a bit older as well as parents. I’ll get into that in a bit. We will be making a String Art Vase that will look super cute holding either dried flowers or artificial flowers.
Materials needed will be:
A piece of wood(size can differ here)
Sandpaper
Wood stain or paint
Saw-hook for hanging
Screwdriver
Nails
Hammer
Scissors
Embroidery thread or yarn
Dried or artificial flowers
Piece of paper and pencil for your hand-drawn vase template
You’ll want to start by choosing which flower you will be using and what piece of wood will work with it. If you have a rough-cut piece of wood, use some sandpaper to smooth it out. Depending on the final look you want, you may stain it or paint it your color of choice. I used a demo cabinet piece that was perfect for this up-cycle project.
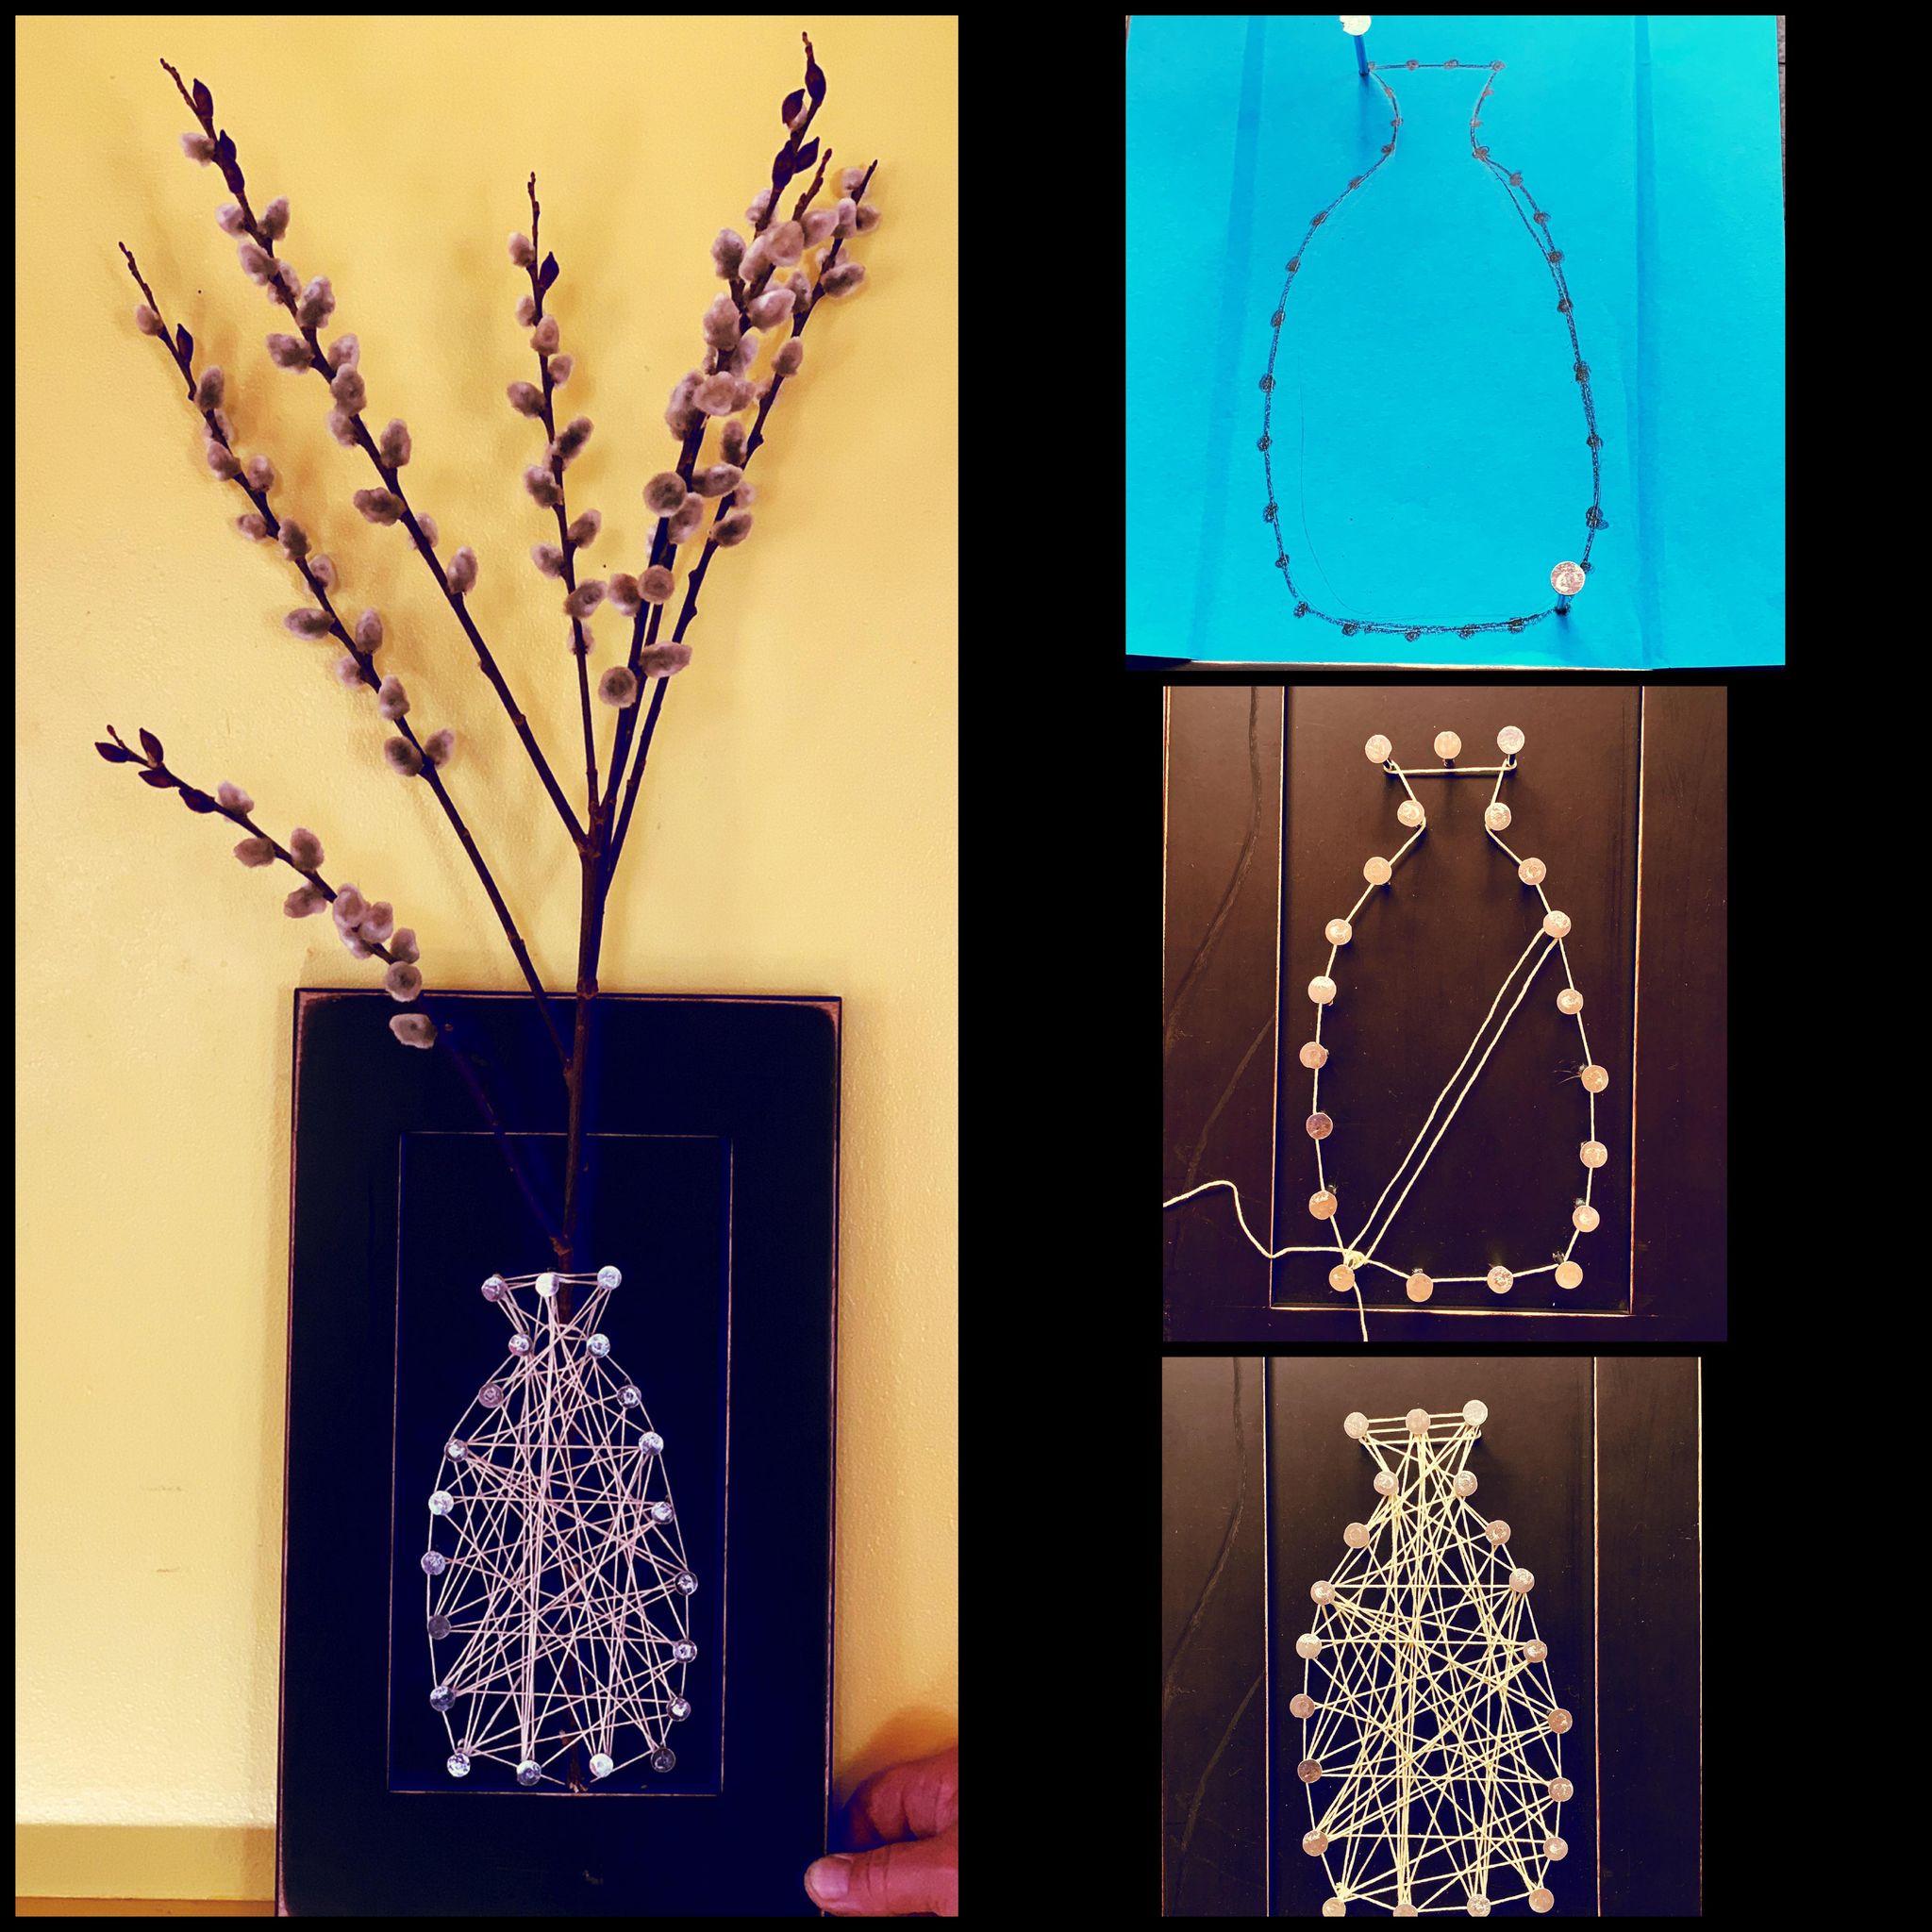
It’s time to draw just an outline of your vase. You can get creative here and draw one that fits nicely on your wooden piece. It could be a small round vase, a tall & long vase or even a mason jar shape vase. Now you are going to draw dots along the outline drawing of your vase about every inch starting at the bottom left of your vase and going all of the way around (see pictures).
Center the vase template on your wood. The bottom of the vase should be about 1” off of the bottom of the wood. Now for the fun part! I actually found this part quite therapeutic! Perfect for getting out a bit of pandemic stress. It’s time to nail the template to the wood using the dots you drew as markers. This is why it’s an older kid/adult DIY. Start at the bottom left corner of the vase and hammer a nail in. Then nail it in the top right corner. This will help prevent the template from slipping and becoming off-center. The nails don’t have to go in much, just until they are strong enough to be steady in the wood. Finish hammering in all of the nails, then tear out the paper template ripping sideways. If little pieces of paper remain stuck, just use your fingers or a pair of tweezers to get them out.
After checking to make sure all of your nails are securely in place, time to grab your thread of choice. Start at the bottom left nail and wrap the thread around it and tie. Continue wrapping the thread around the exterior of the vase’s nails. When you get to the neck of the vase, if it’s a curvy top, wrap your twine along the inside to make the curve. Finish wrapping your thread around the vase template until you reach the beginning point.
At this point it’s time to start wrapping your thread in any which way around the interior of the vase. If you want it to look more symmetrical, pay attention to which nails you are going to. When you are satisfied with how it looks, cut your string and double knot it onto a nail, trim it fairly close to the nail, and tuck in the ends.
You may have noticed the thread likes to make it’s way up to the top of the nails as you worked on it. That’s what you want to happen in order for there to be room for you to place your floral selection through the top of the vase. If you wish to hang this, grab a saw-hook and screw it into the back of your wood using a screwdriver. Enjoy your one of a kind creation. Use seasonal floral items and you have a great piece of art!
If you’d like me to put a Get Crafty kit together for this project just reach out to
Valley Art Supplies
76 Cottage Street
Easthampton, Ma. 01027
413-527-0763
Email info@valleyartsupplies.com
Stay Crafty!
Juliette Mooers